JEA-HB Help
Model Number JEA-HB Wireless Solar Perimeter Alarm Basic Test Setup (run this setup test before final install)
Understanding your Perimeter Alarm Posts:
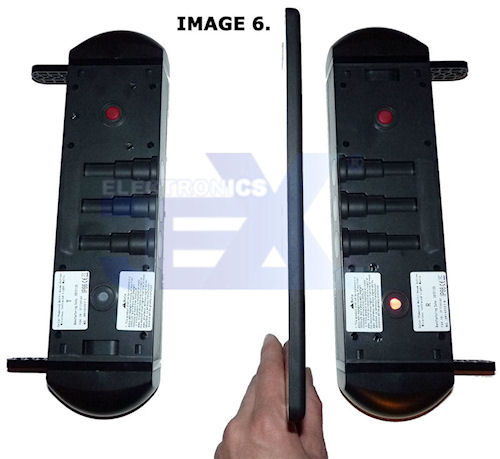
The Perimeter alarm post labeled "T" is the Transmitter post, its only function is to send IR beams to the receiver Post labeled "R".
The perimeter alarm post Labeled "R" is the receiver post which detects the break in beams and sends the alarm signal to the control panel. This is the post you want closest to the control panel when you do final setup of your system.
Perimeter Alarm Post Setup
Place solar perimeter posts across a flat surface from each other (see image 1)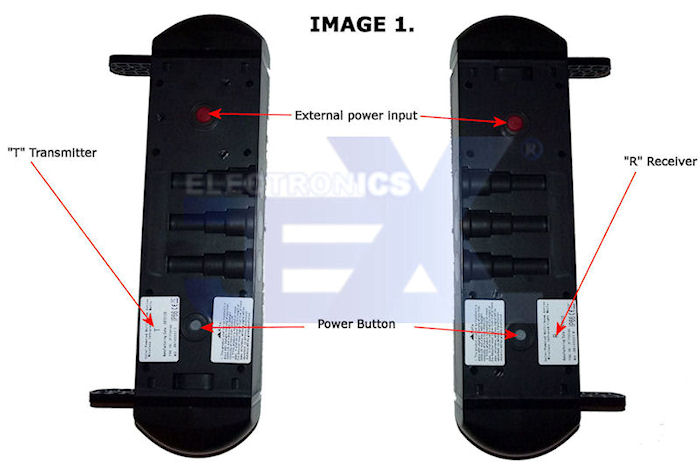
Turn on both posts using the power button on the back. Press the power button 3 times fast. You will hear a long beep if successful.
 If both posts are aligned you will notice the power lights flash and turn off. Once both are off this means they are setup ready to detect a break in the beams. Leave the posts in this state and proceed to control panel setup.
Control Panel Setup
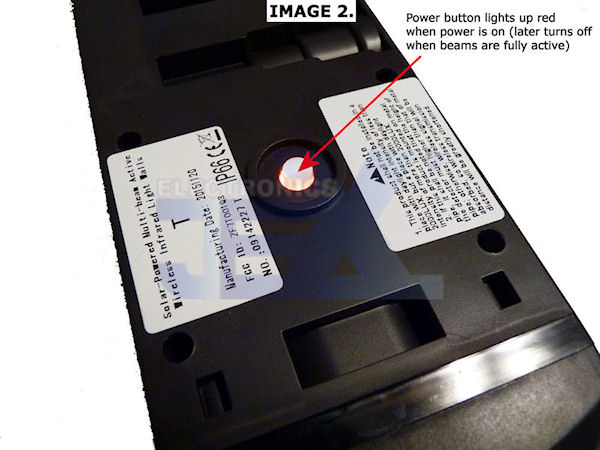
Power on the by plugging in the provided power adapter into the power port on the top (see image 3) Once power is plugged up switch the power switch to on (see image 3)
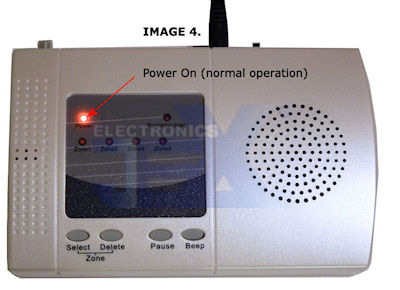
The Power LED will light up to indicate the RF receiver is powered on (see image 4)
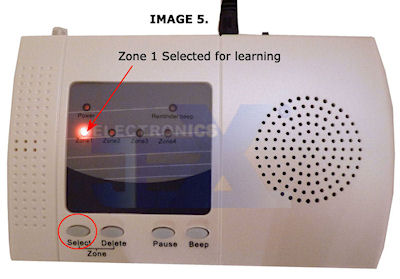
Hold down the select button until the desired Zone to be programmed lights up. Image 5 shows Zone 1 ready to be programmed.
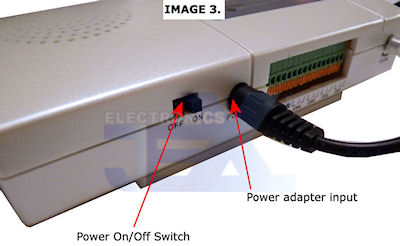
Now trigger the signal to be sent from the receiver post by blocking all the beams (must block all beams). Use a solid object like a thick book because IR can pass through thinner objects like paper and even cardboard (see image 6). The light on the Receiver post will light up to show is has detected a break in the beams and is sending a signal to the control panel. The control panel will sound to indicate it has received the signal and has learned it on the zone you have selected. Hold down select until the power LED lights up again. The control panel is now ready to sound when the beams are broken and will light up the zone that activated it. Again break the beams as described previously to test the setup.